To image neurons in vivo with a large field of view, a large objective is necessary. This big piece of metal and glass is in indirect contact with the brain surface, with only water and maybe a cover slip in between. The objective touching the brain effectively results in local cooling of the brain surface through heat conduction (Roche et al., eLife, 2019; see also Kalmbach and Waters, J Neurophysiology, 2012). Is this a problem?
Maybe it is: Cooling by only few degrees can result in a drop of capillary blood flow and some side-effects (Roche et al., eLife, 2019). And it has also been shown (in slice work) that minor temperatures changes can affect the activity of astrocytic microdomains (Schmidt and Oheim, Biophysical J, 2020), which might in turn affect neuronal plasticity or even neuronal activity.
For a specific experiment, I wanted to briefly test how such a temperature drop affects my results. Roche et al. used a commercial objective heating device with temperature controller, and a brief email exchange with senior author Serge Charpak was quite helpful to get started. However, the tools used by Roche et al. are relatively expensive. In addition, they used a fancy thermocouple element together with a specialized amplifier from National Instruments to probe the temperature below the objective.
Since this was only a brief test experiment, I was hesitant to buy expensive equipment that would maybe never be used again. As a first attempt, I wrapped a heating pad, which is normally used to keep the temperature of mice during anesthesia at physiological levels, around the objective; however, the immersion medium below the objective could only heated up to something like 28°C, which is quite a bit below the desired 37°C.
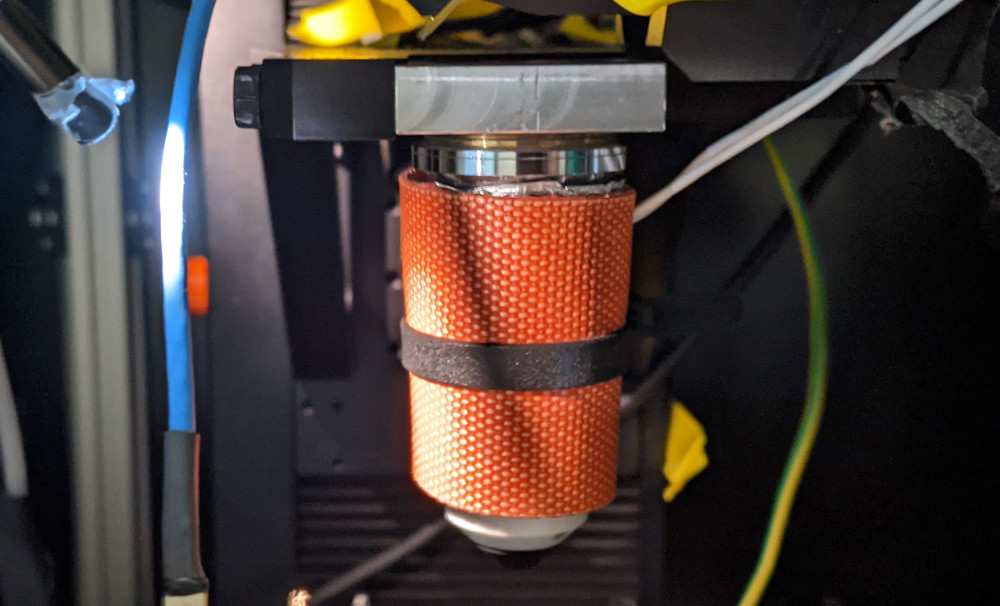
Therefore, I got in touch with Martin Wieckhorst, a very skilled technician from my institute. He suggested a more effective heating of the objective by using a very simple solution. After a layer of insulation tape (Kapton tape, see picture below), we wrapped a constantan wire, which he had available from another project, in spirals around the objective body, followed again by a layer of insulation tape. Then, using a lab power supply, we just sent some current (ca. 1A at 10 V) through the wire. The wire acts as a resistor – therefore it is important that adjacent spirals do not touch each other – and produces simply heat that is taken up by the objective body.
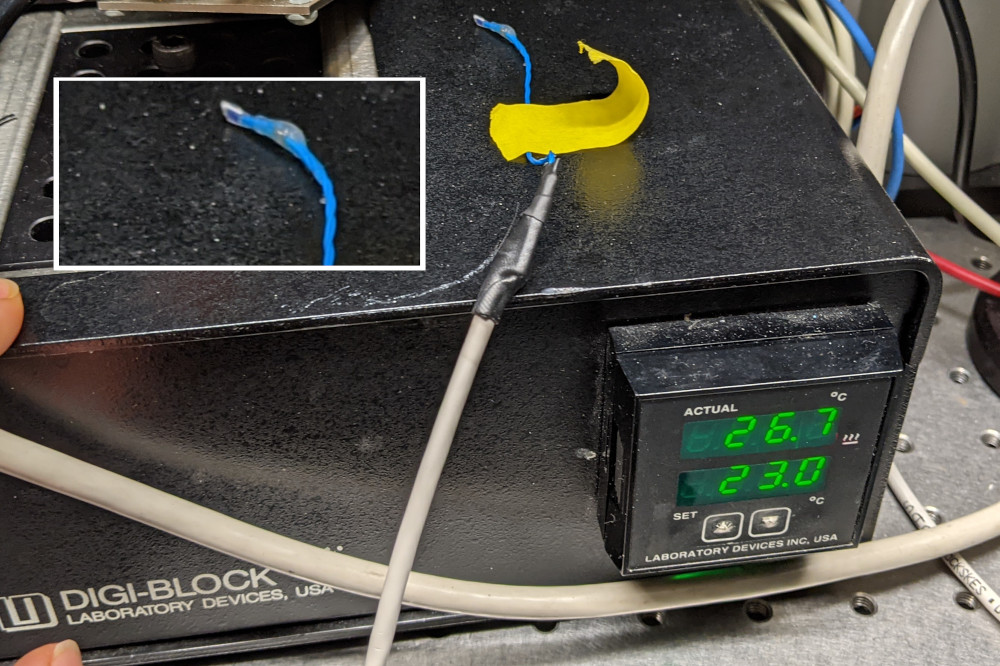
To measure the temperature below the objective, we needed a sensor as small as possible. A typical thermometer head would simply not fit into the space between objective and brain surface. We decided to use a thermistor or RTD (resistance temperature detectors). How can we read out the resistance and convert it into temperature? Fortunately, Martin found an old heating block which contained a temperature controller (this one). These controllers are typically capable to use information from standardized thermistors of different kinds or thermocouples.
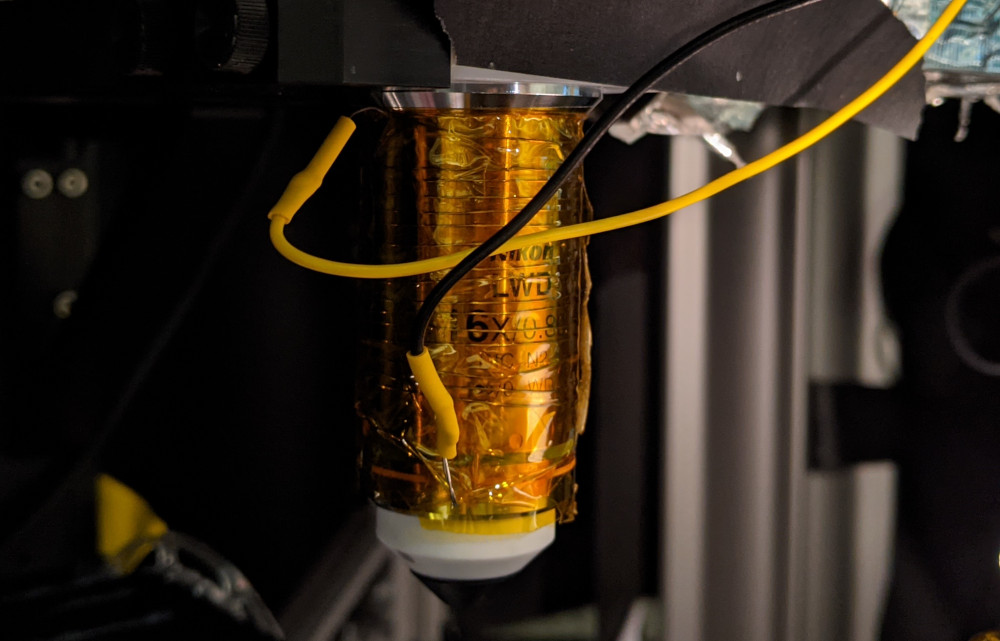
Next, we bought the sensor itself, a PT100 thermistor (I think it was this one) with a very small spatial footprint. The connection from the PT100 to the temperature controller is pretty straightforward once you understand the connection scheme based on three wires (explained here). This three-wire scheme serves to eliminate the effect of the electrical resistance of the cables on the measurement. Then, we dipped the head of the PT100 into non-corrosive hot glue in order to prevent a shortcut of the PT100 resistor once it dips into the immersion medium. The immersion medium is at least partially conductive and would therefore affect the measure resistance and also the measured temperature. Once we had everything set up, we checked the functionality of the sensor in a water bath, using a standard thermometer for calibration. Another way to perform this calibration would be an ice bath, which is stably at 0°C.
The contact surface of my objective with the immersion medium is mostly glass and a bit of plastic, therefore it took roughly 30-60 min until the temperature below the objective reached a stable value of around 37°C. In order to prevent that the heat is distributed throughout the whole microscope, we used a plastic objective holder that does not conduct heat.
Together, I found this small project very instructive. First, I was surprised to learn how reliable and fast an objective heater based on simple resistive wire can be. Heating up the metal part of the objective up to >60°C within minutes was no problem. It took however much longer until the non-metal parts of the objective also reached the desired temperature. I was also glad to see that the objective (16x Nikon) was not damaged and its resolution during imaging was not affected by its increased temperature!
The problem of designing a very small temperature sensor was more complicated, also due to the standard three-wire scheme to measure with thermistors. However, all components that we used were relatively cheap, and I think that these temperature measurement devices are interesting tools that could be used also for other experiments, e.g., to monitor body temperature or to build custom-made temperature controllers of water bath temperature for slice experiments.

Super nice design. You might be better off with that than some commercial solutions. Some heat the objective too brutally periodically and it can distort the image slightly at that rhythm. This is only second hand experience though. Very nice blog by the way.
Thank you, Pierre.
Pingback: There is no recipe for discoveries | A blog about neurophysiology